Rethinking Scoliosis Movement: From Workout to Ritual
When I was first diagnosed with scoliosis at 14, every specialist handed me the same list of exercises. Do these stretches. Strengthen your core. Avoid these movements. I followed the protocol religiously for years, yet my back still ached, and I still felt disconnected from my body. It wasn't until I stopped treating movement as a workout and started treating it as a daily ritual that something shifted. Gentle movement for scoliosis isn't about checking boxes or chasing symmetry. It's about building a lifelong conversation with your unique curve.
Most articles about scoliosis focus on specific exercises you should do or avoid. They frame gentleness as a modifier - a gentler version of the same old routines. But that misses the point entirely. For people with scoliosis, gentle movement is not a scaled-down workout. It's a completely different philosophy: one where breath leads, where transition matters more than the pose, and where everyday activities like sitting and walking become opportunities for alignment and ease.
This article will guide you through that philosophy. You'll learn why breath-led transitions matter more than any single stretch, how to modify movements for your specific curve pattern (C-curve vs. S-curve), and how to weave micro-movements into your daily life. You'll also address the unspoken fear - the kinesiophobia that makes many of us avoid movement altogether - and learn to move with confidence, not just without pain.
What Activity Is Good for Scoliosis? (And Why It's Not What You Think)
The common advice is that swimming, Pilates, and yoga are good for scoliosis because they're low-impact and promote flexibility. That's true to a point, but the real answer is more nuanced. What's good for scoliosis is any movement that respects your curve's natural pattern and allows you to breathe fully. The best activity is the one you can do consistently, without pain, and with mindful attention.
In my experience, the most beneficial approach is one that combines gentle mobility work with proprioceptive training - learning where your body is in space. Activities like Feldenkrais, Alexander Technique, and certain forms of somatic movement are excellent because they don't force a specific outcome. Instead, they teach you to sense and respond to your own asymmetries.
That said, the activity itself matters less than how you do it. A simple walk can be therapeutic if you pay attention to your foot strike and the subtle rotation of your torso. Conversely, even a supposedly gentle yoga class can cause harm if the teacher blindly insists on equal-length sides. So the question isn't "what activity?" but "how do you approach the activity?"
Why Traditional Exercise Lists Fall Short
Most scoliosis exercise lists include the same staples: cat-cow, child's pose, side planks, and the ever-popular "scapular squeezes." These aren't wrong, but they're generic. They don't account for the direction of your curve, the location of your apex, or your current level of tissue tension. A person with a right thoracic curve needs different cues than someone with a left lumbar curve.
Moreover, traditional lists often emphasize stretching the tight side and strengthening the weak side. That sounds logical, but it can actually reinforce the problem. If you aggressively stretch a hypermobile area, you may increase instability. The goal isn't to create symmetry - your spine is structurally different. The goal is to create balance within your unique structure.
So what's genuinely good? Movement that respects your curve, allows for breath, and doesn't force your spine into positions it can't comfortably hold. That includes everything from gentle walking and swimming to somatic movement and modified Pilates. The key is that you're not trying to "fix" your spine; you're trying to improve its function and reduce discomfort.
Can I Correct My Scoliosis Naturally? (The Honest Answer)
This is the question I get asked most often, and the answer is both yes and no. In adults, structural scoliosis (a fixed curvature of the spine) cannot be completely "corrected" through exercise alone. The bones have taken a set shape, and no amount of stretching or strengthening will straighten them. However, you can absolutely improve your posture, reduce pain, and prevent progression through natural movement practices.
In adolescents, especially those with mild curves, exercises like the Schroth method have been shown to reduce curve magnitude in some cases. But even then, "correction" is a limited goal. The real benefit of natural approaches is functional improvement - better breathing, reduced pain, improved mobility, and greater body awareness.
When I stopped trying to "fix" my curve and instead started working with it, my pain decreased significantly. I also noticed that my posture looked better, not because my spine straightened, but because I was holding myself with more ease and less compensatory tension. That's the honest truth: you can't erase scoliosis, but you can transform your relationship with it.
If you're looking for a structured approach, many people find success with the Schroth method or the SEAS approach (Scientific Exercise Approach to Scoliosis). These are evidence-based programs that focus on curve-specific exercises. But they're intense and require professional guidance. For those who prefer a gentler, more mindful path, the principles I share here can be just as transformative - without the pressure of "correction."
The Philosophy of Gentle Movement: Beyond Stretching and Strengthening
Gentle movement for scoliosis is a philosophy that prioritizes sensation over achievement. Instead of asking "How far can I stretch?" or "How many reps can I do?" you ask "How does this feel?" and "Can I breathe through this?". This shift in mindset is what separates a ritual from a routine.
The core principles are simple: movement should be pain-free, breath-led, and curve-aware. It should never force your spine into extreme positions. It should include plenty of rest and recovery. And most importantly, it should be practiced with curiosity, not judgment.
When I first embraced this philosophy, I had to unlearn years of "no pain, no gain" conditioning. I remember lying on my mat, doing a gentle twist, and my instructor said, "Your curve is asking you to go to the left. Can you give it that?" That was a revelation. Instead of fighting my body, I was listening to it.
This approach doesn't mean you'll never challenge yourself. Gentle movement can still be demanding - holding a side plank with proper alignment is hard work. But the challenge comes from engagement, not from forcing your body into a shape it doesn't want to take.
Why Transition Matters More Than the Pose
In most exercise classes, the focus is on the final position: the deep stretch, the held pose. But for scoliosis, the transition is where the magic happens. Moving slowly through an arc, with breath and awareness, teaches your nervous system to explore new ranges without fear. This is especially important because scoliosis often creates joint stiffness and muscle tension that makes sudden movements painful.
For example, instead of holding a seated twist for 30 seconds, try moving in and out of the twist over the course of a minute. Let your breath guide the motion - inhale to lengthen, exhale to twist a little deeper. This is called a breath-led transition, and it's the foundation of gentle scoliosis movement.
These transitions also help to lubricate the joints and warm up the tissues gradually. They're particularly useful in the morning when your spine is stiff, or before any more vigorous activity. By making transitions the focus, you reduce the risk of injury and increase your body's ability to move with ease.
Breath-Led Transitions: The Foundation of Your Daily Ritual
Your breath is the most underutilized tool in scoliosis management. Not only does proper breathing improve oxygen flow and reduce stress, but it also creates intra-abdominal pressure that supports your spine. When you breathe deeply, your diaphragm descends, and your ribs expand - this is crucial for scoliosis, where ribcage asymmetry often restricts breathing.
Breath-led transitions are simply movements that are timed with your inhale and exhale. The principle is to expand with the inhale and soften with the exhale. For example, when you lift your arms overhead, you inhale. When you fold forward, you exhale. This coordination not only makes movement feel more fluid but also prevents breath-holding, which is a common response to fear or tension.
Here's a simple breath-led transition you can try right now: sit on a chair with your feet flat on the floor. Inhale, and gently lift your left arm (the side of your convex curve, if you have a right thoracic curve). Exhale, and reach your right arm across your chest, letting your spine follow. Inhale, come back to center. Exhale, and repeat on the other side. Notice how your breath guides the movement. Do this for five cycles, and you'll feel your spine wake up.
The key is to never force the breath. If you feel breathless, slow down. The movement should be as long as the breath is comfortable. Over time, you'll develop a natural rhythm that you can apply to any movement - from bending down to pick something up to reaching for a high shelf.
Three Breath-Led Micro-Movements to Start Today
- Rib Cage Expansion: Sit or stand tall. Place your hands on your lower ribs. Inhale, and feel your ribs expand sideways and backward. Exhale, and let them soften inward. Repeat for 10 breaths. This helps to improve rib mobility and breathing capacity.
- Pelvic Tilts with Breath: Lie on your back with knees bent. Inhale, and let your lower back arch slightly. Exhale, and gently tilt your pelvis to press your lower back into the floor. Move with your breath for 10 cycles. This mobilizes the lumbar spine and engages the core.
- Cat-Cow with a Twist: Start on all fours. Inhale, and drop your belly, lift your chest and tailbone (cow). Exhale, and round your spine, tucking your chin (cat). On the next exhale, add a slight rotation toward the side of your convex curve. Inhale back to cow. Repeat slowly, letting your breath dictate the pace.
These micro-movements are safe for most scoliosis types, but always listen to your body. If any position causes sharp pain, back off and try a smaller range.
Curve-Specific Modifications: C-Curve vs. S-Curve
One size definitely does not fit all in scoliosis movement. Your curve pattern determines which directions are safe and which are potentially aggravating. The two most common patterns are a single C-curve (thoracic or lumbar) and a double S-curve (thoracic and lumbar, often with counterbalancing curves).
For a C-curve, the spine bends in one direction. If you have a right thoracic C-curve, your spine bows to the right at the chest level. Movement that elongates the left side and strengthens the right side is generally beneficial. But that's a simplification. The key is to avoid movements that compress the concave side (the inside of the curve) and to focus on elongating the convex side.
For an S-curve, you have two curves that bend in opposite directions. This is more complex because a movement that helps one curve may aggravate the other. For example, a side stretch that lengthens the thoracic convex side might compress the lumbar convex side. In this case, you need to think in terms of overall balance rather than spot-specific stretches.
How to Modify Common Movements for Your Curve
Let's take a simple side stretch. If you have a right thoracic C-curve, you want to lengthen the left side (the concave side). So you would reach your right arm over your head and bend to the left. That's intuitive. But if you have an S-curve with a right thoracic and left lumbar, you need to be more careful. A pure left side bend might lengthen the thoracic concave side but compress the lumbar concave side (which is on the right).
A better approach for S-curves is to use rotational movements that address both curves simultaneously. For example, a seated twist can be modified to rotate toward the side of the thoracic convexity while gently articulating the lumbar spine. The key is to move slowly and to monitor how your body responds.
If you're unsure about your curve pattern, ask a physical therapist or a scoliosis specialist. You can also try to feel your own curve by running your fingers down your spine while bending forward - the curve will be visible in the rib hump or the lumbar prominence. But even without a formal diagnosis, you can use the principle of "move toward the side that feels stuck" with caution.
In my experience, the most important modification is to avoid any movement that causes pinching or sharp pain. That's your body's signal that you're going against the grain. Instead, find a smaller range of motion that feels spacious. Remember, gentle doesn't mean ineffective. It means intelligent.
Micro-Movements for Daily Life: Sitting, Standing, Walking
The real power of gentle movement lies not in your exercise mat but in how you move through your day. Most of us spend hours sitting at a desk, standing in line, or walking on hard floors. These repetitive positions can exacerbate scoliosis discomfort if we do them mindlessly. But with a few micro-movements, you can turn everyday activities into opportunities for spinal health.
Sitting: The Art of Perching and Adjusting
Sitting is often the most challenging position for scoliosis because it compresses the spine. The key is to avoid staying in one position for more than 20 minutes. You can use a timer to remind yourself to shift. When you do, focus on subtle movements: a pelvic tilt, a gentle twist, or a shoulder roll.
One powerful micro-movement is the "perch." Sit on the edge of your chair, and tilt your pelvis forward slightly, so your sit bones point down. This engages your core and reduces the pressure on your lower back. Hold for a few breaths, then release. Repeat several times throughout the day.
Another is the "desk twist." While sitting, place your right hand on the left side of your chair (or your left hand on the right side, depending on your curve). Inhale, lengthen through your spine. Exhale, and gently twist toward the side of your convex curve. Hold for a breath, then release. This is particularly helpful for mid-back stiffness.
Remember to keep your feet flat on the floor and your knees at hip height. If your chair doesn't support your lower back, use a rolled towel or a lumbar cushion. And if you need a snack during your work break, choose something that won't spike your energy - as we cover in our 10 Desk-Friendly Snacks Under 100 Calories, a small piece of fruit or some nuts can keep you fueled without making you sluggish.
Standing: The Unlock and the Shift
When standing, especially for long periods, the tendency is to lock your knees and hang from your spine. Instead, keep a slight bend in your knees and let your pelvis rest in a neutral position. Think of your head floating upward, and your tailbone pointing down. This aligns your spine and reduces strain.
A useful micro-movement is the "unlock": gently rock your weight forward and back on your feet, then side to side. This shifts the pressure on your intervertebral discs and keeps your joints lubricated. You can also do a small shoulder roll: shrug your shoulders up to your ears, then let them drop back and down. Repeat a few times.
If you're waiting in line, try a subtle pelvic tilt or a gentle side bend. No one will notice, but your spine will thank you. The key is to keep the movements small and frequent - once every 10 to 15 minutes.
Walking: The Rotational Rhythm
Walking is excellent for scoliosis because it involves natural rotation of the spine. But many of us walk with a wayward arm swing or a slight limp. To make walking a therapeutic movement, focus on the rhythm of your arms and legs. Let your arms swing naturally with a slight rotation in your torso. Imagine a string pulling the crown of your head upward, lengthening your spine.
You can also practice a "breath walk." Inhale for three steps, exhale for three steps. This not only calms your nervous system but also encourages a deeper, more rhythmic movement. As you walk, notice if you tend to lean to one side. Consciously shift your weight to the center of your feet.
If you have an S-curve, you may notice that one leg swings more easily than the other. That's normal. The goal is not to make them equal but to allow both sides to move without forcing. Over time, your gait will become more fluid, and you may experience less back pain.
Addressing Kinesiophobia: Moving Without Fear
Kinesiophobia - the fear of movement - is a silent companion for many people with scoliosis. You may worry that a certain move will make your curve worse, or that you'll feel pain and not be able to stop. This anxiety is understandable, but it often leads to a sedentary lifestyle, which actually worsens spinal health.
The first step to overcoming kinesiophobia is to reframe pain. Not all pain is a warning sign. Some discomfort is just your body adapting to new movement patterns. Start with tiny, pain-free movements and gradually expand your range. This is called graded exposure, and it's a proven method for reducing fear.
In my own journey, I remember being terrified of backbends. Every time I tried one, I felt a sharp pinch in my lower back. So I stopped doing them. But then I learned that the pinch was due to poor technique - I was arching from my lower back instead of my thoracic spine. By starting with a gentle chest opener, I slowly built up to a full backbend without pain.
Another technique is to use "safe words" or "safe positions." Establish a position that always feels comfortable, like child's pose or simply lying on your back. When you feel fear creeping in, return to that position. This gives you a sense of control and safety.
If you're just starting out, consider following a structured program that emphasizes gradual progression. Our 30-Day Gentle Movement Plan for Beginners is designed to help you build confidence and consistency, with daily sessions that start at just 5 minutes and gradually increase. It's a great way to overcome the initial resistance and develop a sustainable habit.
Remember, the goal is not to eliminate all fear - some caution is healthy. But you want to move from a place of fear to a place of trust. Trust that your body knows what to do, and that gentle movement will guide you toward greater ease.
A Gentle Movement Ritual: Step-by-Step Sample (15 Minutes)
Here's a simple ritual you can do every day, combining the principles we've discussed. It's designed to be gentle, breath-led, and curve-aware. You'll need a mat or a non-slip surface, and a chair if you need extra support.
- Centering (2 minutes): Sit on a chair or cross-legged. Close your eyes and take five slow breaths. With each inhale, feel your ribs expand. With each exhale, soften your jaw and shoulders. Set an intention for your practice, such as "I move with ease" or "I listen to my body."
- Rib Cage Expansion (3 minutes): Sit tall, place your hands on your ribs. Inhale, expand your ribs sideways and backward. Exhale, soften. Repeat for 10 breaths. Then, add a gentle twist to the right and left, moving with your breath.
- Cat-Cow with Breath (3 minutes): Come to all fours. Inhale, drop your belly, lift your chest and sit bones (cow). Exhale, round your spine (cat). Repeat for 10 cycles, then add a subtle rotation toward your convex side on the exhale. Do 5 more cycles.
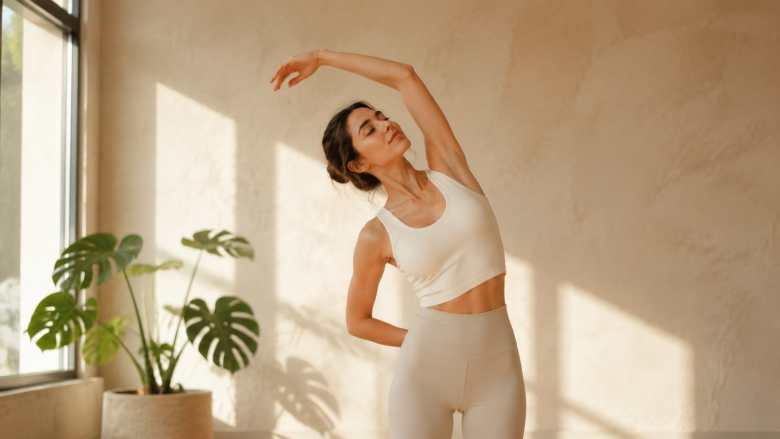
- Standing Side Reach (3 minutes): Stand tall, feet hip-width apart. Inhale, reach your right arm overhead, and exhale, side bend to the left (if you have a right thoracic curve, this lengthens the concave side). Hold for one breath, then inhale back to center. Repeat on the other side, but with less intensity. Do 5 rounds each side.
- Seated Twist with Breath (2 minutes): Sit on a chair, feet flat. Inhale, lengthen your spine. Exhale, twist to the right, placing your right hand on the left knee and your left hand on the chair back. Hold for 3 breaths, then exhale back to center. Repeat to the left.
- Savasana with Support (2 minutes): Lie on your back with a pillow under your knees and a folded towel under your head. Close your eyes and breathe naturally for 2 minutes. Notice the areas of your back that touch the floor and those that don't. Let go of any effort.
This ritual is just a starting point. You can adapt it to your needs - add more time, include other movements, or do it in sections throughout the day. The key is consistency. Even 5 minutes a day is beneficial.
When to Seek Professional Guidance
While gentle movement is safe for most people with scoliosis, there are situations where you should consult a professional. If you experience sudden sharp pain, numbness, or weakness in your limbs, or if your curve progresses rapidly, seek medical advice.
Also, if you're new to exercise or have other health conditions like osteoporosis or arthritis, it's wise to work with a physical therapist who specializes in scoliosis. They can create a personalized plan that addresses your specific curve pattern and limitations.
There are several evidence-based approaches you might consider: the Schroth method, the SEAS approach, or the Barcelona Scoliosis Physical Therapy School. These programs use specific exercises and breathing techniques to improve curve stability and function. They're often more intense than the gentle ritual I've described, but they can be highly effective.
However, you don't need a specialist to start moving gently. The principles of breath-led transitions, curve awareness, and micro-movements are safe to practice on your own. Trust your body, and don't be afraid to start small.
Bringing It All Together: Your Daily Ritual
Gentle movement for scoliosis is not a quick fix or a one-size-fits-all routine. It's a daily ritual that honors your unique spine and your body's wisdom. By shifting your focus from "exercises" to "movement with awareness," you can reduce pain, improve function, and build a more confident relationship with your body.
Remember the key takeaways: breath leads every movement; transitions matter more than poses; and your curve pattern should guide your choices. Incorporate micro-movements into your sitting, standing, and walking. Face your fear of movement with gentle progression. And above all, be kind to yourself.
When I started this journey, I was looking for a cure. What I found was something better - a way to live fully in my body, curve and all. I hope these principles help you do the same. Start with one breath, one movement, and let your ritual unfold.